How to Add Radio Buttons to WordPress Forms

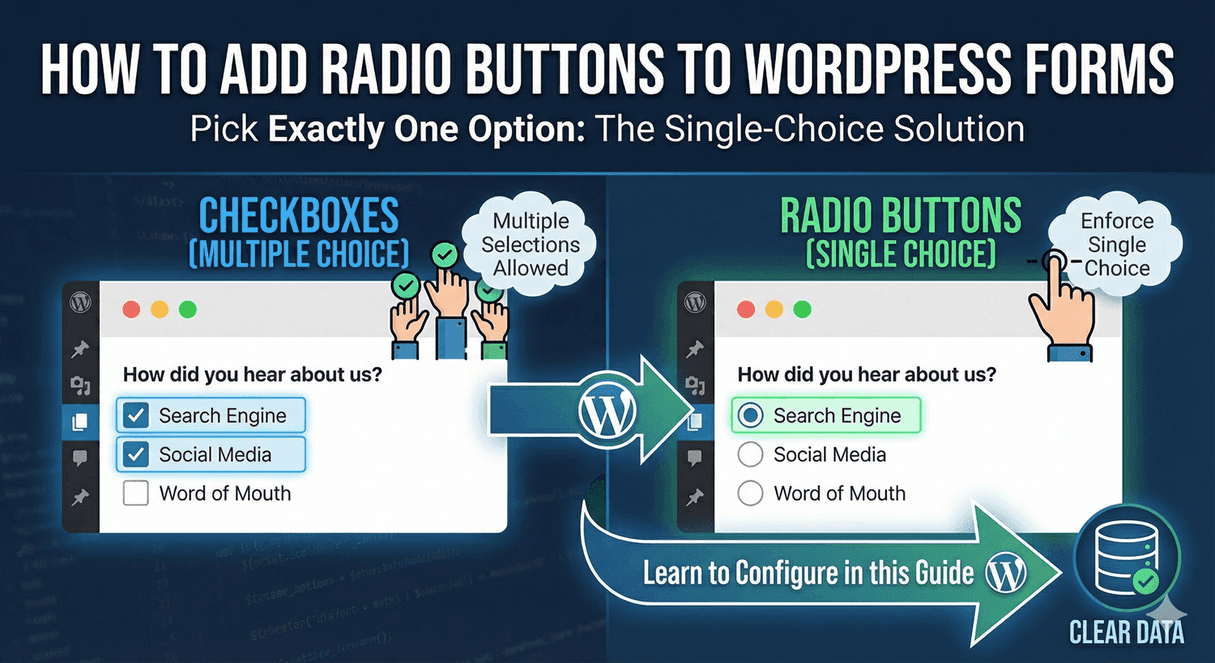
When users need to pick exactly one option from a list, radio buttons are the answer. Unlike checkboxes that allow multiple selections, radio buttons enforce a single choice—perfect for questions like “How did you hear about us?” or “Select your plan.” One click, one selection, clear data.

In this guide, you’ll learn how to add and configure radio button fields in your WordPress forms.

When to Use Radio Buttons

Perfect For

  • Mutually exclusive choices: “Male / Female / Other”
  • Plan selection: “Basic / Pro / Enterprise”
  • Yes/No questions: “Do you have experience?”
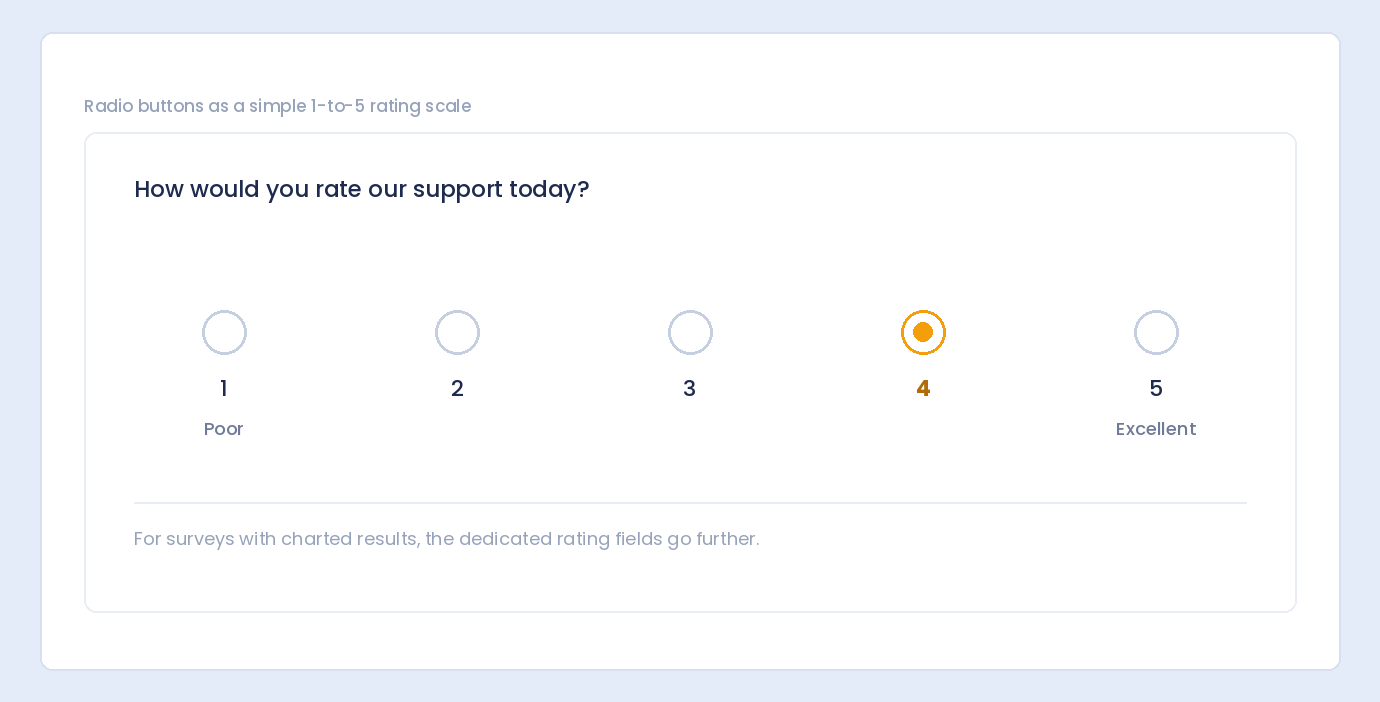
  • Rating scales: “Excellent / Good / Fair / Poor”
  • Preference selection: “Morning / Afternoon / Evening”
  • Category selection: “Support / Sales / Billing”

Key Characteristics

  • Only one selection allowed
  • Selecting one deselects others
  • All options visible at once
  • Best for 2-7 options

Radio Buttons vs. Checkboxes

Radio Buttons Checkboxes
Single selection only Multiple selections allowed
Must choose one (usually) Can choose none
Mutually exclusive Independent options
“Choose one” “Select all that apply”

Radio Buttons vs. Dropdown

Radio Buttons Dropdown
All options visible Options hidden until clicked
Better for 2-7 options Better for 5+ options
Quick visual scan Compact space usage
One click to select Click to open, then select

Adding Radio Buttons in Auto Form Builder

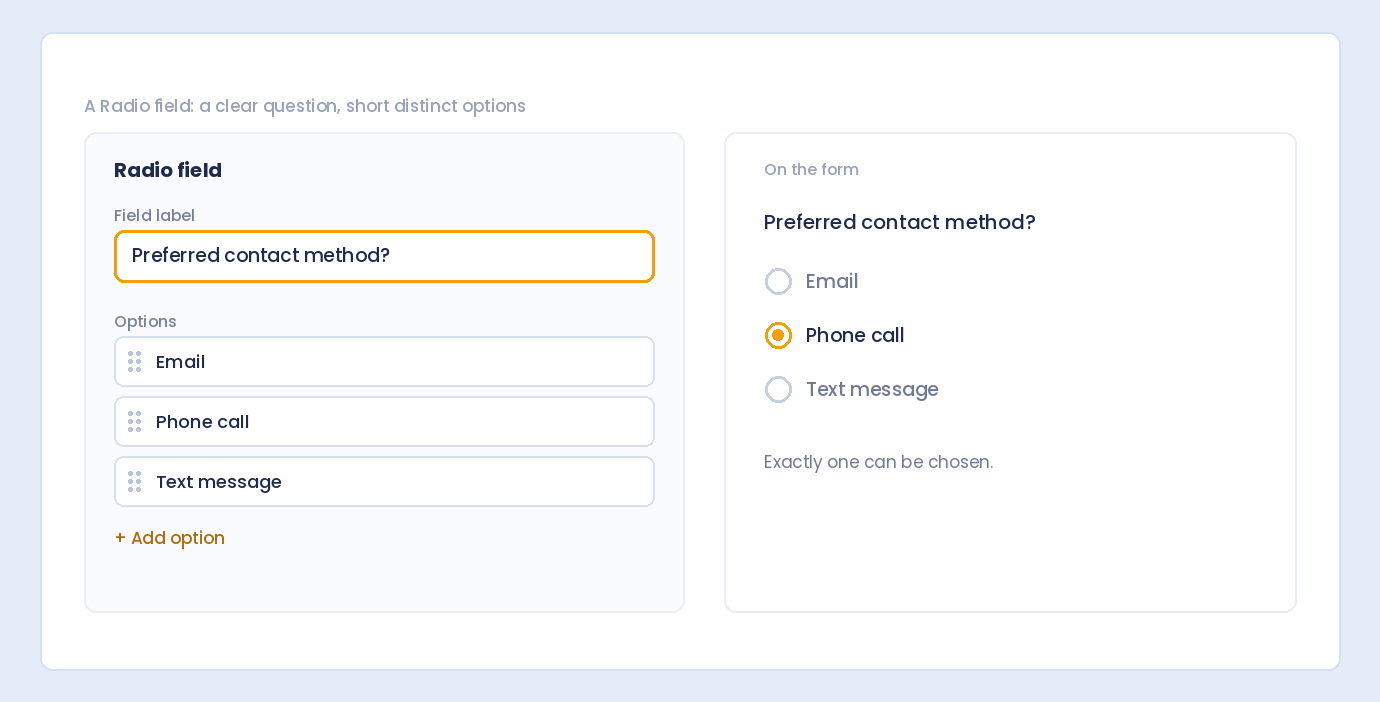
Step 1: Add Radio Field

  1. Open your form in AFB
  2. Find the Radio field in the sidebar
  3. Drag it onto your form canvas
  4. Click to configure

Step 2: Configure Label and Help Text

  • Label: Your question (e.g., “How did you hear about us?”)
  • Help text: Additional instructions if needed
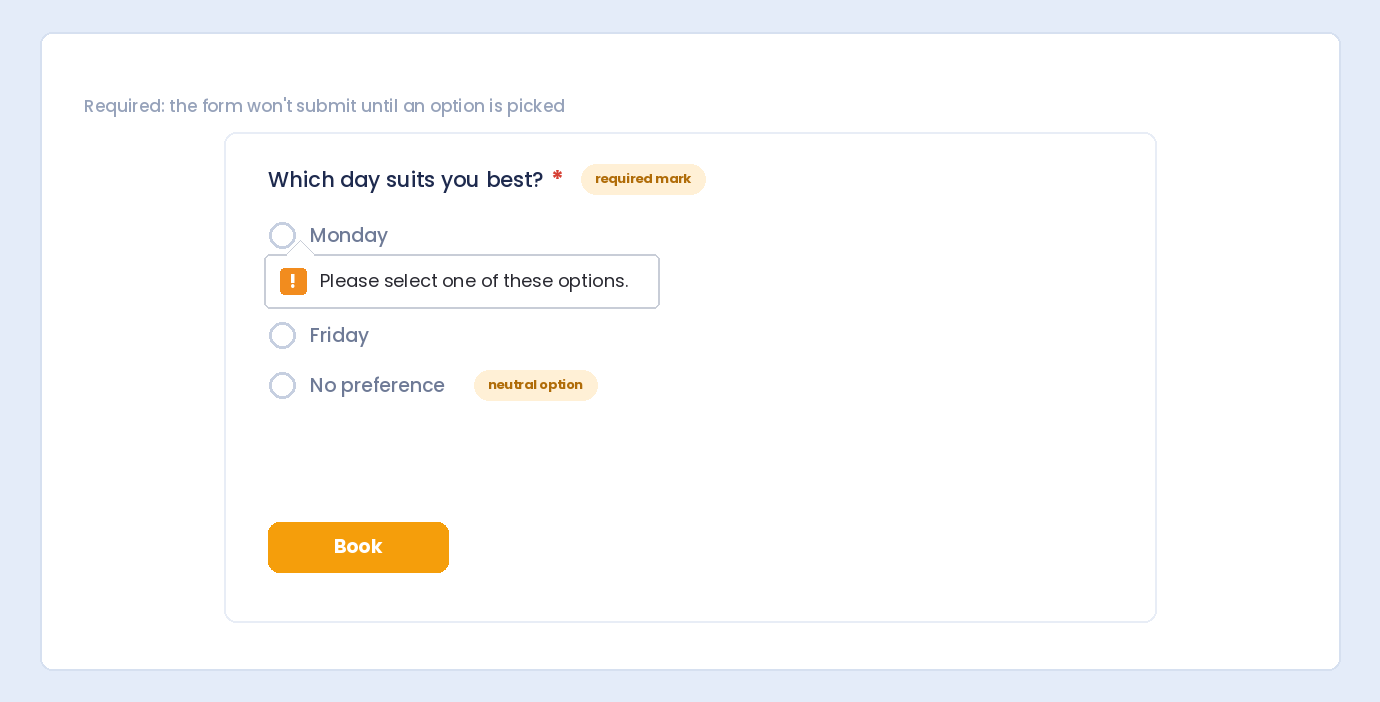
  • Required: Toggle on if user must select an option

Step 3: Add Options

Enter each option on a new line:

Google Search
Social Media
Friend or Colleague
Advertisement
Other

Step 4: Choose Layout

Vertical Layout

○ Option One
○ Option Two
○ Option Three

Best for:

  • Longer option labels
  • 3+ options
  • Mobile-friendly display
  • Easy scanning

Horizontal Layout

○ Yes   ○ No   ○ Maybe

Best for:

  • Short labels
  • 2-4 options
  • Yes/No questions
  • Rating scales

Step 5: Set Default Selection (Optional)

Pre-select an option:

  • Most common choice
  • Recommended option
  • Or leave none selected (user must choose)

Step 6: Configure “Other” Option (Optional)

Allow custom input:

  • Enable “Other” option
  • Text field appears when selected
  • Captures responses not in your list

Radio Button Configuration Examples

How Did You Hear About Us?

Label: “How did you hear about us?”

Options:

  • ○ Google Search
  • ○ Social Media
  • ○ Friend or Colleague
  • ○ Advertisement
  • ○ Blog or Article
  • ○ Other: [________]

Settings: Required, Vertical layout, “Other” enabled

Yes/No Question

Label: “Have you used our service before?”

Options:

  • ○ Yes
  • ○ No

Settings: Required, Horizontal layout

Plan Selection

Label: “Select your plan”

Options:

  • ○ Basic – $9/month
  • ○ Professional – $29/month
  • ○ Enterprise – $99/month

Settings: Required, Vertical layout, Default: Professional

Satisfaction Rating

Label: “How satisfied are you with our service?”

Options:

  • ○ Very Satisfied
  • ○ Satisfied
  • ○ Neutral
  • ○ Dissatisfied
  • ○ Very Dissatisfied

Settings: Required, Vertical layout

Time Preference

Label: “Best time to contact you?”

Options:

  • ○ Morning (9am-12pm)
  • ○ Afternoon (12pm-5pm)
  • ○ Evening (5pm-8pm)

Settings: Required, Vertical or Horizontal

Gender Selection

Label: “Gender”

Options:

  • ○ Male
  • ○ Female
  • ○ Non-binary
  • ○ Prefer not to say

Settings: Optional, Vertical layout

Contact Method Preference

Label: “Preferred contact method”

Options:

  • ○ Email
  • ○ Phone
  • ○ Text Message

Settings: Required, Horizontal layout

Priority Level

Label: “How urgent is this request?”

Options:

  • ○ Low – No rush
  • ○ Medium – Within a week
  • ○ High – Within 48 hours
  • ○ Urgent – ASAP

Settings: Required, Vertical layout

The “Other” Option

When to Include “Other”

  • Can’t list every possibility
  • Want to discover new responses
  • Users might have unique answers
  • Research/survey purposes

How It Works

  1. User sees “Other” as last option
  2. When selected, text field appears
  3. User types their custom answer
  4. Stored as “Other: [their text]”

When to Skip “Other”

  • Fixed set of valid answers (plans, departments)
  • Data must match predefined values
  • Integration requires specific options

Layout Best Practices

When to Use Vertical

  • Options have longer text
  • More than 3-4 options
  • Mobile-first design
  • Labels include descriptions

When to Use Horizontal

  • Short, simple labels
  • 2-4 options maximum
  • Yes/No or similar binary
  • Scale ratings (1-5)

Visual Examples

Good: Horizontal for Yes/No

Are you over 18?  ○ Yes  ○ No

Good: Vertical for Multiple Options

Department:
○ Sales
○ Support
○ Billing
○ Technical
○ Other

Bad: Horizontal for Long Labels

○ I'm very satisfied  ○ I'm somewhat satisfied  ○ I'm neutral  ○ I'm dissatisfied
(Wraps awkwardly, hard to read)

Default Selection Guidelines

When to Pre-Select

  • Most users choose this option
  • You’re recommending an option
  • Speeds up form completion

When NOT to Pre-Select

  • No clearly common answer
  • Want unbiased responses
  • Survey/research purposes
  • Legal implications (consent, agreements)

Bias Consideration

Pre-selecting can bias responses:

  • Users may accept default without thinking
  • Skews survey results
  • For neutral data, leave unselected

Validation and Requirements

Required Radio Buttons

When required is on:

  • User must select one option
  • Cannot submit with no selection
  • Error message if skipped

Optional Radio Buttons

When required is off:

  • User can skip the question
  • Form submits without selection
  • Use for non-essential questions

Validation Messages

  • “Please select an option”
  • “This field is required”
  • Custom messages for clarity

Common Use Cases

Contact Forms

  • Department routing (Sales, Support, Billing)
  • Inquiry type
  • Preferred contact method

Surveys

  • Satisfaction ratings
  • Likelihood to recommend (NPS)
  • Agreement scales
  • Demographic questions

Order Forms

  • Shipping method
  • Payment type
  • Size selection
  • Color choice

Registration Forms

  • Account type
  • Membership level
  • Experience level

Booking Forms

  • Time preference
  • Location choice
  • Service type

Accessibility Considerations

Proper Labeling

  • Each radio button has a label
  • Clicking label selects the button
  • Screen readers announce correctly

Keyboard Navigation

  • Tab to reach radio group
  • Arrow keys to move between options
  • Space or Enter to select

Visual Clarity

  • Clear selected/unselected states
  • Good color contrast
  • Sufficient size for clicking
  • Focus indicators visible

Writing Good Radio Options

Be Clear and Specific

Vague:

  • ○ Option 1
  • ○ Option 2

Clear:

  • ○ Email support (response within 24 hours)
  • ○ Phone support (callback within 4 hours)

Use Parallel Structure

Inconsistent:

  • ○ Sales team
  • ○ I need technical help
  • ○ Billing

Consistent:

  • ○ Sales
  • ○ Technical Support
  • ○ Billing

Keep It Concise

Too long:

  • ○ I would like to receive marketing emails about new products and special offers

Better:

  • ○ Yes, send me updates

Mutually Exclusive

Options shouldn’t overlap:

Overlapping:

  • ○ 1-5 employees
  • ○ 5-10 employees

Correct:

  • ○ 1-5 employees
  • ○ 6-10 employees

Troubleshooting

Options Not Saving

  • Check for empty lines between options
  • Ensure options are properly entered
  • Save and refresh form

Selection Not Working

  • Check for JavaScript conflicts
  • Clear browser cache
  • Test in incognito mode

Wrong Layout Displaying

  • Verify layout setting is saved
  • Check theme CSS overrides
  • May need to adjust styling

Frequently Asked Questions

How many options should radio buttons have?

2-7 options is ideal. More than 7, consider a dropdown. For just 2 clear options (Yes/No), radio buttons work great.

Should I pre-select an option?

Only if there’s a genuinely common choice or you’re making a recommendation. For surveys and unbiased data, leave unselected.

Can users deselect all options?

Standard radio buttons can’t be fully deselected once one is chosen. If “no answer” should be possible, add a “None” or “N/A” option, or make the field optional.

What’s the difference between radio buttons and a dropdown?

Radio buttons show all options at once (better for few options). Dropdowns hide options until clicked (better for many options, saves space).

When should I use “Other” option?

When you can’t predict all possible answers and want to capture unexpected responses. Skip it when answers must match predefined values.

Summary

Adding radio buttons to WordPress forms:

  1. Add Radio field – Drag to form
  2. Write clear label – The question being asked
  3. Add options – One per line, mutually exclusive
  4. Choose layout – Vertical for most, horizontal for short options
  5. Set required – If user must answer
  6. Add “Other” if needed – For capturing unexpected answers
  7. Consider default – Only if appropriate

Conclusion

Radio buttons are essential for single-choice questions. They make selection clear—users know they can pick only one—and they’re faster than dropdowns when you have just a few options. Use them for plan selection, satisfaction ratings, yes/no questions, and any scenario where exactly one answer is needed.

Auto Form Builder provides flexible radio button fields with vertical and horizontal layouts, “Other” option support, and default selection capabilities. Create clear, professional single-choice questions in minutes.

Ready to add radio buttons? Download Auto Form Builder and build forms with clear single-choice options.

Leave a Reply

Your email address will not be published. Required fields are marked *