
Collecting birthdates on your WordPress forms sounds simple, but a few smart settings make all the difference. In this guide, you’ll learn how to configure Auto Form Builder’s Date field to work perfectly as a birthday field. Open Auto Form Builder and create a new form or edit an existing one. In the left sidebar, find the Date field and drag it onto your form canvas. Click on it to open the field settings. Change the Field Label to something clear like “Date of Birth” or “Birthday”. Under “How to Display Dates”, choose the format that matches your audience. US style shows Month/Day/Year. Most other countries use Day/Month/Year. For international forms, the ISO format Year-Month-Day works universally. Pick the one your visitors will find most familiar. This is the most important part for a birthday field. You have two settings — First Allowed Date and Last Allowed Date. For a birthday field, leave the First Allowed Date empty or set it to a date around 100 to 120 years ago to cover all realistic birthdates. For the Last Allowed Date, click Today — this prevents users from selecting a future date, which makes no sense for a birthday. As an extra layer of protection, enable Block Future Dates. This completely prevents any date after today from being selected, making sure your birthday field only accepts real past dates. You can control what date the field shows by default. Choose from No pre-selected date which leaves it blank, Today’s date, Tomorrow’s date, or a Specific date you choose. For a birthday field, No pre-selected date is the best choice — you don’t want today’s date pre-filled in a birthday field. If your form requires users to be a minimum age — for example 18 or older — set the Last Allowed Date to exactly 18 years before today. This means anyone born after that date cannot be selected, effectively enforcing the age requirement. Add a Help Text message like “You must be at least 18 years old” so users understand the requirement upfront. Show Date Preview Chip is enabled by default and shows a human-readable date preview next to the input — for example “Apr 16, 2026” — which helps users confirm they selected the right date. No Weekend Selection is available if your use case requires weekday-only dates, though for birthday fields you’ll leave this off since people are born on weekends too. Always add Help Text below the field to guide your users. Something like “Enter your date of birth” or “You must be at least 18 years old to register” sets clear expectations and reduces errors. Once your birthday field is configured, click Save Form, copy the shortcode, and paste it on any WordPress page where you need the form. A proper birthday field is just a Date field with the right settings — the right format for your audience, future dates blocked, realistic date limits set, and clear help text for your users. Auto Form Builder gives you all of these options in a simple, visual interface with no coding required. Ready to collect birthdates? Download Auto Form Builder free from WordPress.org and set up your birthday field in minutes.How to Build a Birthday Form Field in WordPress

Adding the Date Field
Choosing the Date Format
Setting Date Limits
Block Future Dates
Starting Date Selection
Age Restricted Forms
Other Useful Options
Adding Help Text
Save and Embed
Conclusion

Learn how to set character limits on WordPress form fields. Configure minimum and maximum length validation for text fields and textareas.
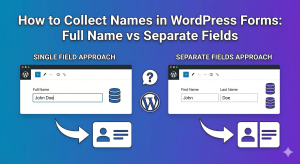
Should you use one field or multiple fields for names? Learn the pros and cons of each approach and how to set up name fields in WordPress.

Learn how to restrict date fields to future dates only for event registration forms. Block past dates and set booking windows in WordPress.

Learn how to add email confirmation fields to your WordPress forms. Prevent typos and ensure you collect valid email addresses every time.

Should you rely on email notifications or store form submissions in your database? Compare both approaches and learn when to use each.

Learn how to add password fields to your WordPress forms. Create secure registration forms with masked input and password confirmation.

Learn how to add a date picker to WordPress forms. Create user-friendly date selection with calendars, format options, and date restrictions.

Learn how to combine date and time fields in WordPress forms for complete scheduling. Create booking forms that capture both when and what time.

Learn how to create searchable dropdown fields in WordPress forms. Help users quickly find options in long lists with type-to-search functionality.

Learn how to create WordPress forms with Canadian address fields including province dropdown and postal code. Perfect for Canadian businesses.

Learn how to create appointment scheduling forms in WordPress with date selection and time slots. Build booking forms for consultations, services, and meetings.
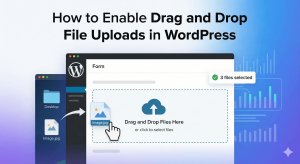
Learn how to add drag and drop file upload functionality to your WordPress forms. Make file uploading easier and more intuitive for users.